Last updated
Modify your landing page
Change the look of and feel of your landing page using the Pages feature in Console.
Table of Contents
In this tutorial section, you will familiarise yourself with the Pages feature in Console. The Pages feature allows you to modify the content and layout of your landing page and other content pages in your marketplace using the no-code editor in Console. At the end of this tutorial, you will have learnt how to edit the landing page of your marketplace. We will change your landing page images and content to align with our sauna-themed marketplace.
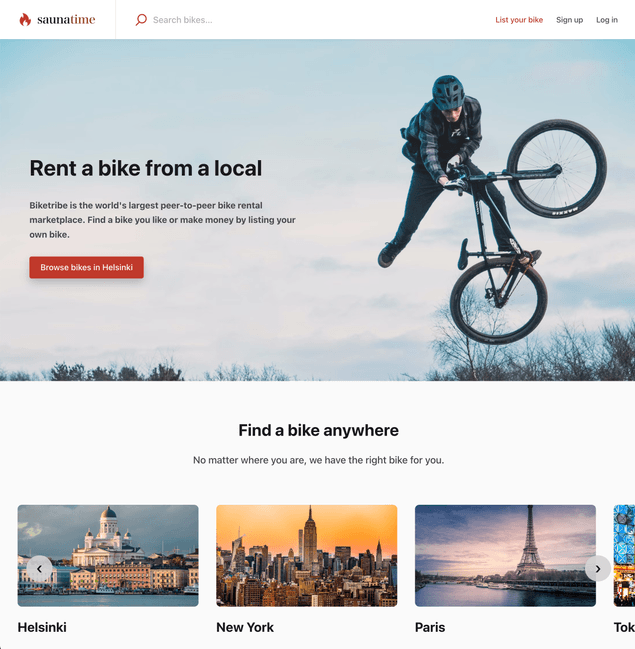
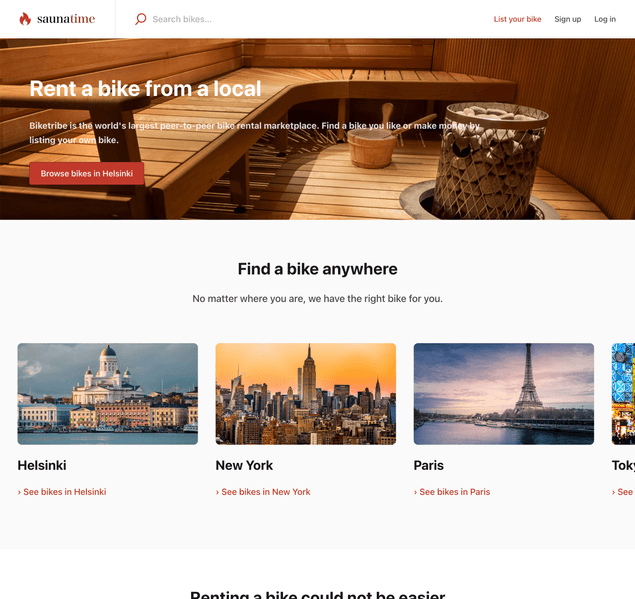
This is what the our landing page looks like so far:
Using Pages
Using the Console you can create and edit content pages without code.
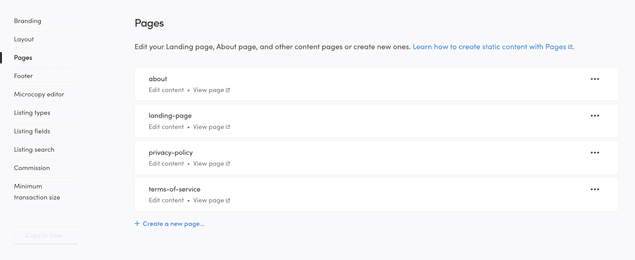
You can modify your content pages by navigating to Flex Console > Build > Content > Pages.
By default, your marketplace has four content pages already created:
- About
- Landing page
- Privacy Policy
- Terms of Service
Each page is identified by their page ID. For pages other than landing
page, the page ID is reflected in the page address on your marketplace.
For example, you can access your About page at /p/about and your
Privacy Policy page at /p/privacy-policy.
The landing page, however, shows up on the root page of your template app by default.
For each page, you can see two links: Edit content and View page. To edit a page, you can either click the link, or just click anywhere in the white container for the page.
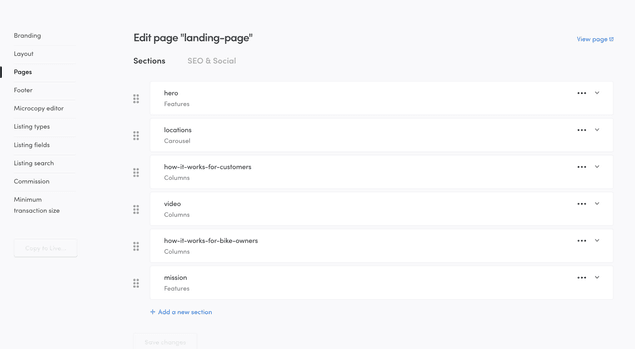
Once you click the link, you can see the default sections for the landing page. You can freely modify, add, and remove the sections as you develop your marketplace.
Change your hero image
The hero image displayed on your landing page plays a vital role in setting the visual tone and capturing the essence of your marketplace. Our first step will be to change the current image with one that we can associated with saunas.
You will begin by modifying the first section, hero. Click open the landing page view and select the hero section.
Update section background image
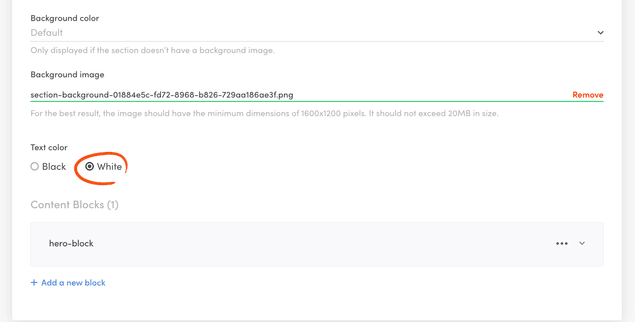
With the hero section open, scroll down to the input for Background image.
Remove the existing one, and then upload the same background image we
used in the previous section of the tutorial:
With this image, we also need to switch the text from white to black. To do that, toggle the Text color buttons below the image input.
You will also need to remove the background image included with the
content block in the hero section. This image is a picture of a cyclist
overlayed on top of the existing hero image. You can remove it by
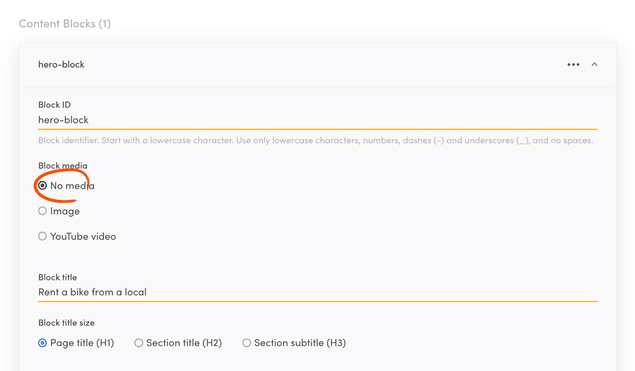
opening the content block hero-id and selecting the "No media" option.
Once you have made these changes, scroll to the bottom of the page to save your changes. Now, refresh your marketplace landing page, and you can see the updated image on the top of the page.
In the next step, you will update the copy text of this section.
Update block contents
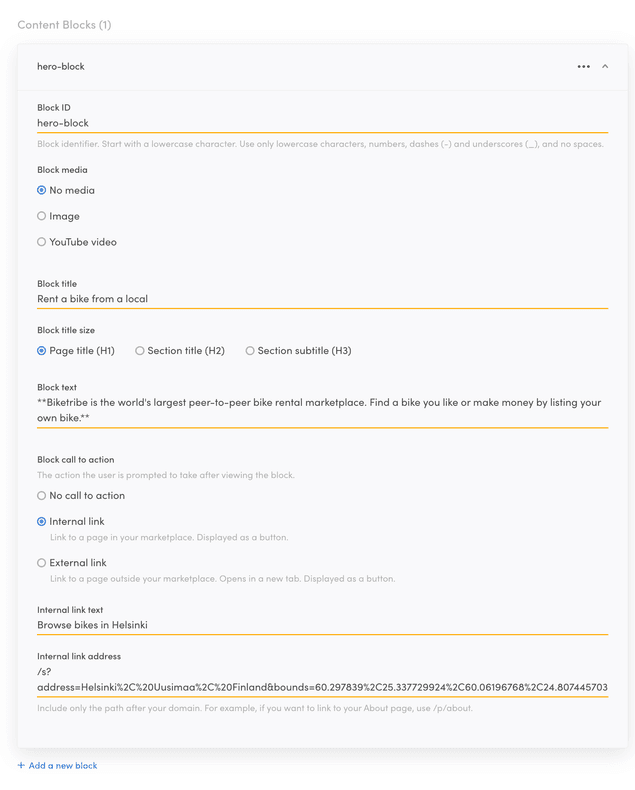
It is possible to add title and ingress content in sections. However, in the hero section, content is inside the block with id hero-block. Click the block to open it and edit the contents.
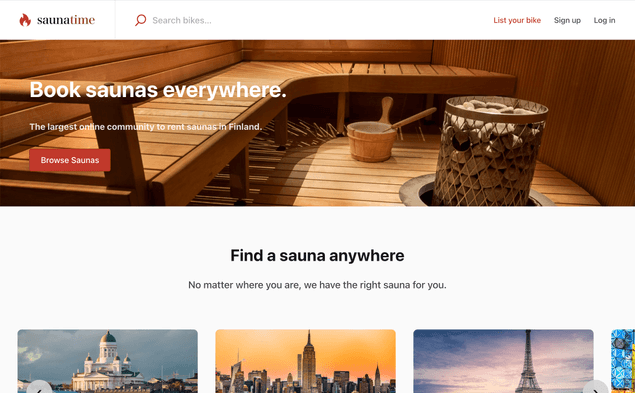
Let's replace the existing title and content with taglines that fit our Sauna-themed marketplace. Once ready, click "Save changes", and refresh your landing page.
You can now see a customised hero element on your marketplace landing page.
Summary
In this tutorial, you got to make your first changes to your marketplace's landing page using the Pages feature in Console. In this section of the tutorial, you learned how to make several customizations, including changing the hero image, adjusting the section's background image and text color, and updating the block contents. In the next article, you will focus on changing microcopy.
Further reading
Learn more about Pages and content modelling from the following articles:
